
![By pixelbuddha [CC BY 3.0 (http://creativecommons.org/licenses/by/3.0)], via Wikimedia Commons](/static/assets/img/search/Search_ballonicon2.svg.png "Double click Ctrl")
When using a static site generator such as Jekyll, Hugo, Hexo, etc., you should write an article with markdown in general, it should be a procedure that you would like to use Git by using commands.
Those who are developers and very much familiar with CLI commands and Git are fine, but if the writer of the article can not use the command, the introduction suddenly hurdles up.
By using Netlify CMS, we can add a management screens to the static site generators such as Jekyll, Hugo, Hexo, etc., and write articles in the administration screen like WordPress and make it public.
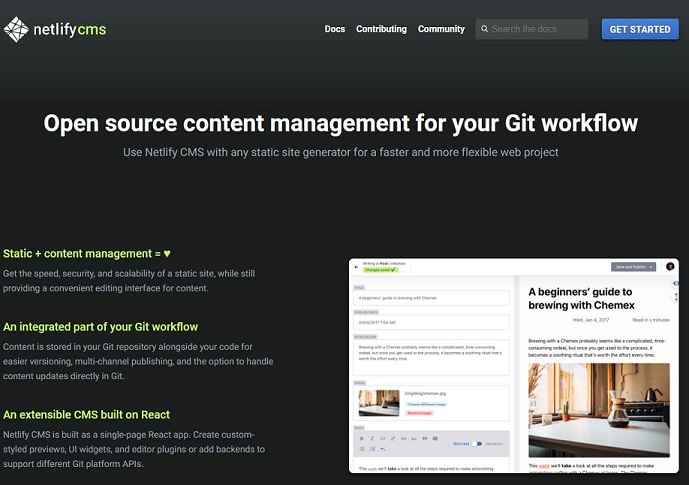
I will add an administrative screen to my site which i have made last time (This is the state where I put in Netlify CMS and I do not know from the outside …)
In order to link Netlify CMS and your GitHub Repository, authentication is required first.
Open “ Developer Applications “ in the settings of your GitHub’s account page .
Click on “Register a new application”.
I will enter it like this. I think that you understand mostly. For “Authorization callback URL” enter “https://api.netlify.com/auth/done”.
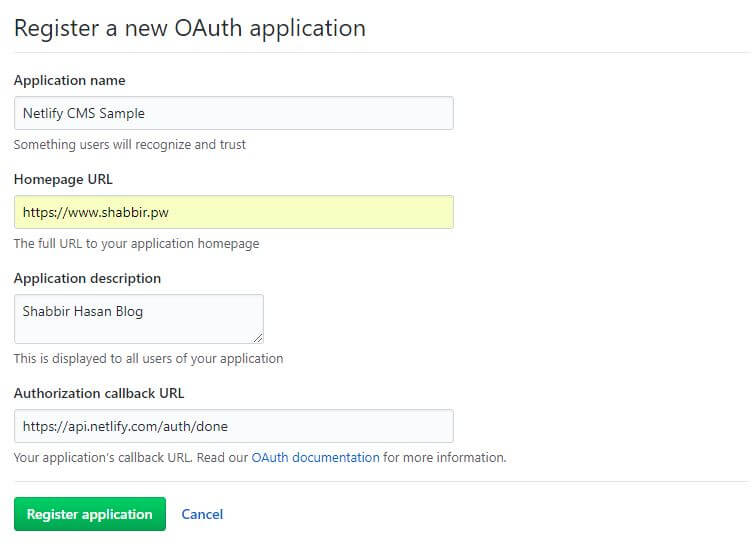
After inputting, press “Register application” button.
If you can register it, you will see two codes “Client ID” and “Client Secret” on the next screen. This code is used in the management screen of Netlify.
Next to the management screen of Netlify.
Select the site you want to add CMS and open the Access tab.
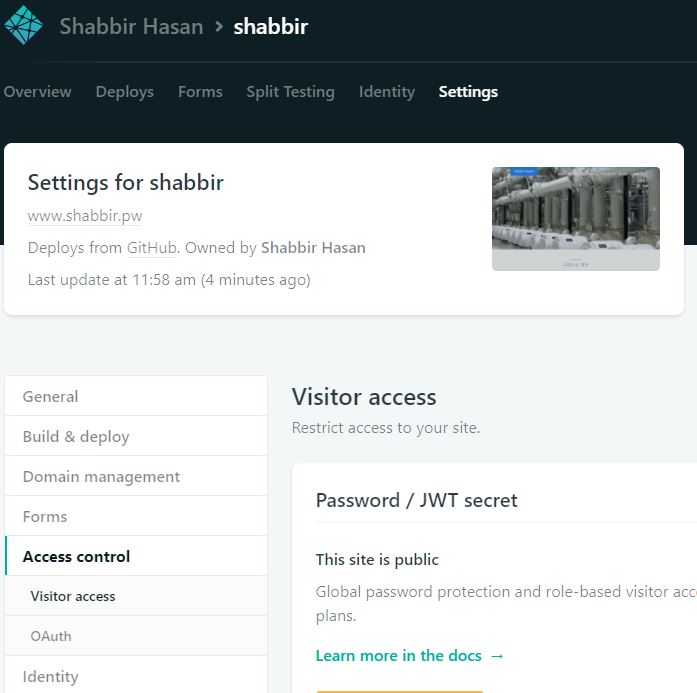
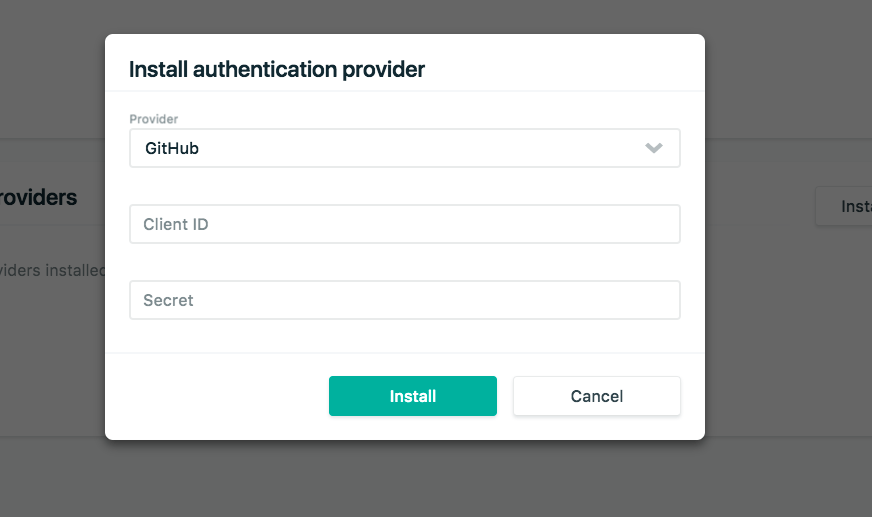
Since there is “Authentication providers” in the lower part, click “Install provider” there. Select “GitHub” from provider list and enter “Client ID” and “Client Secret” to install.
This is OK!
Static site generator decides the file structure for creating management screen.
In the case of Jekyll, it seems to make a directory called “admin” in the “static” directory. The index.html and config.yml are required under the admin directory, but first let us create the index.html.
Here is the code that we have to write in index.html created under the admin directory which is as follows:
<!doctype html>
<html>
<head>
  <meta charset="utf-8" />
  <meta name="viewport" content="width=device-width, initial-scale=1.0" />
  <title>Content Manager</title>

  <link rel="stylesheet" href="https://unpkg.com/netlify-cms@~0.4/dist/cms.css" />

</head>
<body>
  <script src="https://unpkg.com/netlify-cms@~0.4/dist/cms.js"></script>
</body>
</html>
Created in the same directory as index.html; config.yml is the site configuration file. The contents of this file may change depending on the site needs.
Here is the code that i have included in config.yml created under the admin directory which is as follows:
backend:
  name: github
  repo: shabbir-hasan/shabbir-hasan.github.io # Path to your GitHub repository
  branch: master # Branch to update (master by default)

publish_mode: editorial_workflow

media_folder: "static/assets/img/blog" # Folder where user uploaded files should go

collections: # A list of collections the CMS should be able to edit
  - name: "post" # Used in routes, ie.: /admin/collections/:slug/edit
    label: "Post" # Used in the UI, ie.: "New Post"
    folder: "_posts" # The path to the folder where the documents are stored
    create: true # Allow users to create new documents in this collection
    sort: "date:asc" # Default is title:asc
    slug: "---"
    fields: # The fields each document in this collection have
      - {label: "Layout", name: "layout", widget: "hidden", default: "post"}
      - {label: "Title", name: "title", widget: "string", tagname: "h1"}
      - {label: "Publish Date", name: "date", widget: "datetime", format: "YYYY-MM-DD hh:mm:ss"}
      - {label: "Description", name: "desc", widget: "string"}
      - {label: "Keywords", name: "keywords", widget: "string", default: "Shabbir,Hasan,Shabbir-Hasan,Jekyll,gh-pages,website,blog"}
      - {label: "Category", name: "categories", widget: "list", default: [Life]}
      - {label: "Tags", name: "tags", widget: "list", default: ["Shabbir-Hasan","ShabbirHasan","Shabbir","Hasan","Jekyll"]}
      - {label: "Icon", name: "icon", widget: "string", default: "icon-html"}
      - {label: "Body", name: "body", widget: "markdown"}
    meta: # Meta data fields. Just like fields, but without any preview element
      - {label: "Publish Date", name: "date", widget: "datetime", format: "YYYY-MM-DD hh:mm:ss"}
By pushing and merging to master branch with this, management screen will be created.
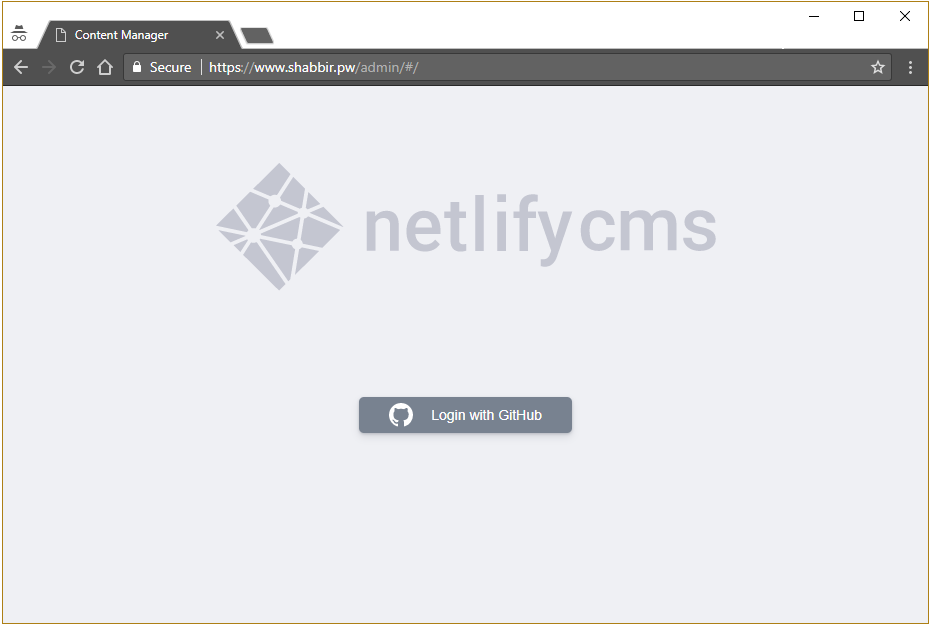
By entering “/admin” after the URL which will be in our case “https://www.shabbir.pw/admin/” , it will open the the management screen, you will be able to login with GitHub authentication when this login screen appears. It is a beautiful view, Isn’t it?
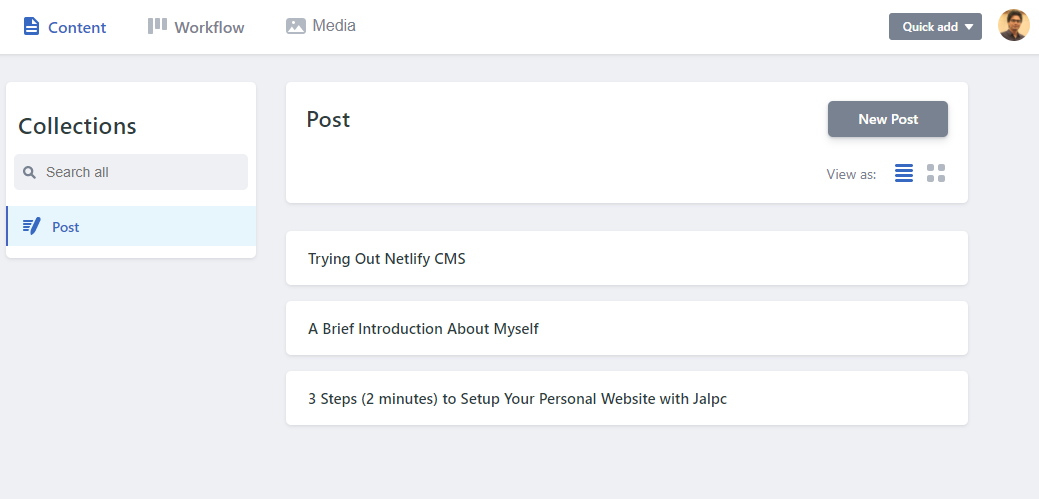
After successful log in you will be presented with the articles you wrote last time!
The article contribution or post page looks something like this.
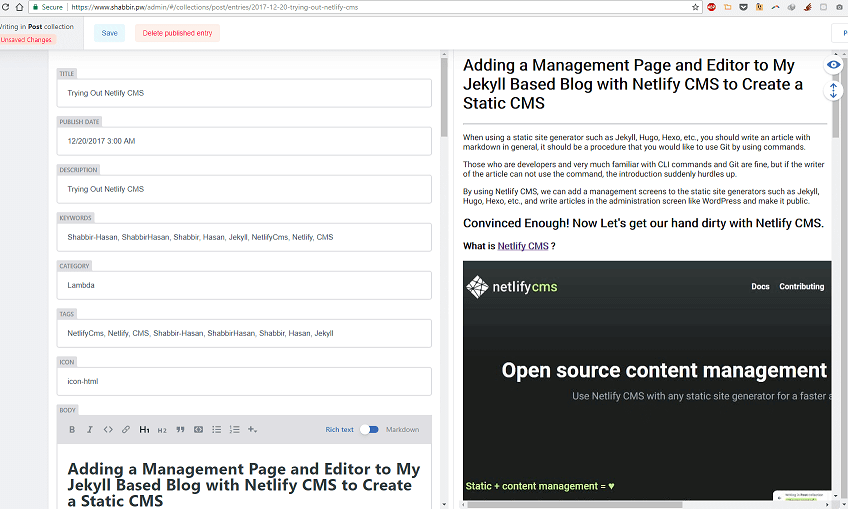
The content you write is reflected in real time on the right side, you can also use markdown. Categories and tags set in config.yml can also be set on the posting screen. Operation of the editor area should be easy to operate without difficulty if you have written a blog.
Below we will briefly explain each item of config.yml.
Below is an example using GitHub.
For repo, i have entered my repo “shabbir-hasan/shabbir-hasan.github.io” you have to change with yours, branch default is master (It can be change to any branch you would like to point to).
backend:
  name: github
  repo: shabbir-hasan/shabbir-hasan.github.io # shall be changed "owner-name/repo-name"
  branch: master # Branch to update
By default Netlify CMS writes an article in the editor and presses “Save”, it will be immediately pushed to GitHub and the article will be published. For those who write articles, it will be difficult to publish as it is, and I think that it is natural that they may want to keep it in the draft state once.
By using Editorial Workflow, you can create articles in the draft state, wait for review if your blog is being operated by multiple people, or follow the workflow to publish.
Just by adding the following you can do it.
publish_mode: editorial_workflow
When this is added, the menu called Editorial Workflow
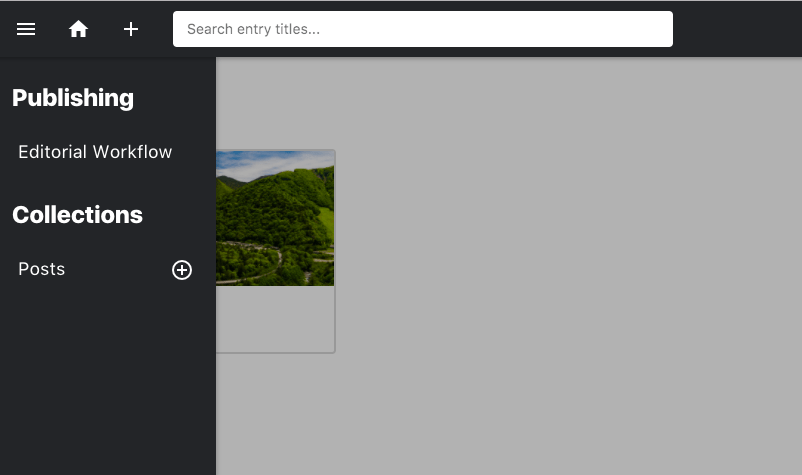
This page looks like this.
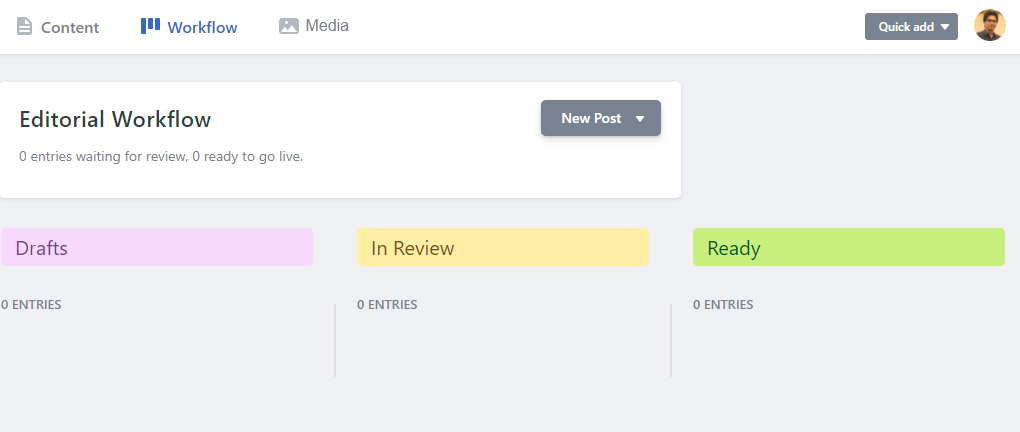
Drag and drop to review status, I hope the state is easy to understand!
You can upload images directly from the Netlify CMS administration screen. Specify the storage location of the image for that. I will write it as follows.
media_folder: "static/assets/img/blog" # Folder where user uploaded files should go
This is where we define the content structure of the site.
Since there are various settings, I think that it is better to see it directly. Also, since the items prepared by the theme should be different, please note that it may not be reflected even if you set it, or it may not be able to build.
This time I changed the contents of Quick Start slightly and tried like the following.
collections: # A list of collections the CMS should be able to edit
  - name: "post" # Used in routes, ie.: /admin/collections/:slug/edit
    label: "Post" # Used in the UI, ie.: "New Post"
    folder: "_posts" # The path to the folder where the documents are stored
    create: true # Allow users to create new documents in this collection
    sort: "date:asc" # Default is title:asc
    slug: "---"
    fields: # The fields each document in this collection have
      - {label: "Layout", name: "layout", widget: "hidden", default: "post"}
      - {label: "Title", name: "title", widget: "string", tagname: "h1"}
      - {label: "Publish Date", name: "date", widget: "datetime", format: "YYYY-MM-DD hh:mm:ss"}
      - {label: "Description", name: "desc", widget: "string"}
      - {label: "Keywords", name: "keywords", widget: "string", default: "Shabbir,Hasan,Shabbir-Hasan,Jekyll,gh-pages,website,blog"}
      - {label: "Category", name: "categories", widget: "list", default: [Life]}
      - {label: "Tags", name: "tags", widget: "list", default: ["Shabbir-Hasan","ShabbirHasan","Shabbir","Hasan","Jekyll"]}
      - {label: "Icon", name: "icon", widget: "string", default: "icon-html"}
      - {label: "Body", name: "body", widget: "markdown"}
name
I think that name is used in the URL of the administration screen. It must be unique.
label
This is the label name used in the menu etc. of the admin page.
folder
The directory where the markdown file is saved. This may be different depending on the theme and usage.
create
To allow the users to create new files in this collection, it shall be set to true
slug
It is how to do URL. , , and are dates etc. The default is .
fields
The contents set in fields are displayed as fields of the editor. For example, titles, descriptions, contributed parts, etc. Categories and tags if necessary.
If fields are set as above, they will be displayed in the editor.
“Label” is the title to be displayed, name is the label in Front Matter in Jekyll, widget is the data type and interface setting of the input.
Adding required: false is obligatory. It seems to be required by default.
Front Matter looks something like this when you pulled an article from the above collections setting from GitHub.
---
layout: post
title: Trying Out Netlify CMS
date: 2017-12-20
desc: Trying Out Netlify CMS
keywords: 'Jekyll, NetlifyCms, Netlify, CMS'
categories:
  - Lambda
tags:
  - NetlifyCms
  - Netlify
  - CMS
  - Jekyll
icon: icon-html
---
See the Widgets page for details.
Lastly, once you set the contents again
backend:
      name: github
      repo: shabbir-hasan/shabbir-hasan.github.io # Path to your GitHub repository
      branch: master # Branch to update (master by default)

    publish_mode: editorial_workflow

    media_folder: "static/assets/img/blog" # Folder where user uploaded files should go

    collections: # A list of collections the CMS should be able to edit
      - name: "post" # Used in routes, ie.: /admin/collections/:slug/edit
        label: "Post" # Used in the UI, ie.: "New Post"
        folder: "_posts" # The path to the folder where the documents are stored
        create: true # Allow users to create new documents in this collection
        sort: "date:asc" # Default is title:asc
        slug: "---"
        fields: # The fields each document in this collection have
          - {label: "Layout", name: "layout", widget: "hidden", default: "post"}
          - {label: "Title", name: "title", widget: "string", tagname: "h1"}
          - {label: "Publish Date", name: "date", widget: "datetime", format: "YYYY-MM-DD hh:mm:ss"}
          - {label: "Description", name: "desc", widget: "string"}
          - {label: "Keywords", name: "keywords", widget: "string", default: "Shabbir,Hasan,Shabbir-Hasan,Jekyll,gh-pages,website,blog"}
          - {label: "Category", name: "categories", widget: "list", default: [Life]}
          - {label: "Tags", name: "tags", widget: "list", default: ["Shabbir-Hasan","ShabbirHasan","Shabbir","Hasan","Jekyll"]}
          - {label: "Icon", name: "icon", widget: "string", default: "icon-html"}
          - {label: "Body", name: "body", widget: "markdown"}
        meta: # Meta data fields. Just like fields, but without any preview element
          - {label: "Publish Date", name: "date", widget: "datetime", format: "YYYY-MM-DD hh:mm:ss"}
Although it got longer, the setting itself is to create an admin folder and create index.html and config.yml.
I have made two and pushed to master, I wrote an article and released it, it was displayed properly! Categories, tags, icons are also available.
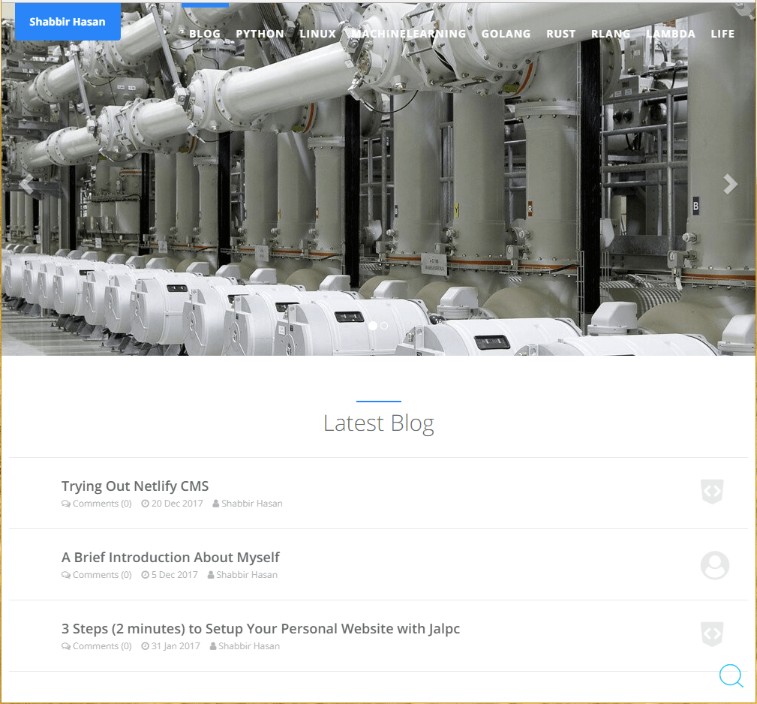
Again, that site.
https://www.shabbir.pw/blog/
At the end, Although it got longer, the point is that you authenticate GitHub, create index.html and config.yml in the admin folder and finish. It is very simple. With management screen and editor, I think that the disadvantage of the static site will be reduced considerably.
Netlify CMS is developed with open source, and I expect it to be more convenient in the future!
The source code of this website is here.
https://github.com/shabbir-hasan/shabbir-hasan.github.io
Thank You :smiley: :thumbsup: :ok_hand:
Machine Learnig Enthusiast
© 2018 Shabbir Hasan